Engagement ring constructo: how to create your dream ring step by step?
- Arvis Kotins
- 9 hours ago
- 3 min read
Every engagement ring is special – it symbolizes love, promise and the unique bond between two people. But what if you don’t want to buy a ready-made model and are looking for something truly personalized?
I have a solution! Try the engagement ring constructor that will allow anyone to create a ring exactly to their liking.
The ring constructor lets you choose every detail – from the band design to the center stone and its setting, with a variety of gem sizes and shapes – making it a great way to create a ring that matches your style, preferences and symbolism.
Here's how to create your dream ring step by step!

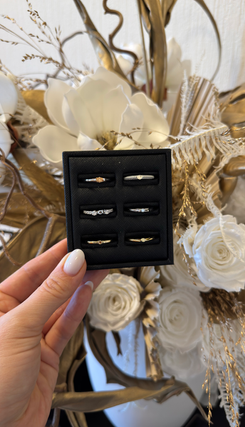
1. Choose a ring band
The ring band determines the overall design of the ring and how it will look on your finger. The designer offers bands of various widths and shapes – from delicate, elegant models to more massive and noticeable designs.
Possible choices:
Classic band (simple, elegant)
Diamond-studded (fully or partially set with diamonds)
Modern design with asymmetrical or unique elements
Band with engravings or special ornaments
Think about how the ring will go with your everyday jewelry and wedding ring – do you want it to harmoniously complement your existing rings?


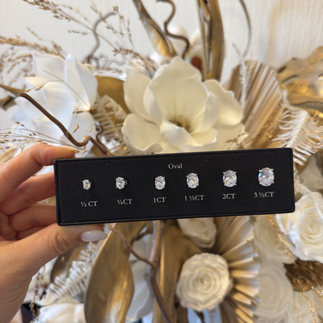
2. Choose your center stone
The center stone is the heart of the ring, so choosing it is one of the most important steps. The designer offers gemstones in a variety of shapes, sizes, and colors to make your ring exactly the way you envisioned it.
Available options:
Diamond shapes: round, oval, pear, marquise, princess, cushion and other cuts
Diamond sizes: from delicate stones to impressive center brilliants
Colored stones: if you want to give your ring a special symbolism, you can also choose sapphires, emeralds, rubies or pink and yellow diamonds
When choosing a center stone, you should consider not only the visual effect, but also how practical it will be for everyday wear and specifically for your bride's lifestyle. You should also think about the placement and "height" of the gemstone on the ring band so that it is comfortable and does not catch.
I set all gemstones using the "smart gemstone" mounting method to ensure that it is safe and comfortable.


3. Choose a stone setting and additional accents
Once you have chosen your main stone, it is time to decide how it will be set in the ring.
Popular setting types:
Solitaire – a classic design that highlights the center stone in all its brilliance
Halo design – the center stone is surrounded by small diamonds that add extra sparkle
Three-stone design or trinity – symbolizes the past, present and future
Non-standard solutions – unique designs that make the ring special
If you want to further personalize your ring, you can add side stones, micropave cuts or personalized engravings.
4. Final details and personalization
To make your ring truly unique, you can also add personalized elements, such as:
Engraving – a special date, initials or meaningful words
A hidden diamond – a small diamond inside as a hidden symbol of love
Choice of metal – from classic yellow and white gold to romantic rose gold
Create a ring that truly reflects you!
The ring designer allows you to create not only engagement rings, but also special gifts for yourself or your loved ones. This is an opportunity to create a piece of jewelry that will be exactly what you dreamed of – with your own unique design, selected gemstones and special symbolism.
If you want to create the ring of your dreams, book a time to talk with me (in person or remotely) on this calendar: